So the other day my husband purchased a bakers rack for me to store the overflow of my pantry. This thing is massive and heavy duty with a 1,200 pound capacity. Well you can bet that I was over the moon about it. It was just what I needed for the storage of my cans that we buy in bulk at Sams. So once the rack was assembled I started putting my wares on the shelves. But honestly, when I stepped by to admire my carefully organized parcels it looked, well, messy and cluttered. So there was only one thing logically that I could do. Cover it in fabric.
Now, the design of it was going to be pretty simple but I knew that I would have to close it curtain style in the front but I didn’t want to see the gaps. Anyways after a lot of brain storming the following was what I ended up doing.
So, to my local fabric store I went…that would be Hobby Lobby. And then off home with my goods to complete what turned out to only take me an hour to complete. I only spent about $12 in total for this project as I already had the everything except the fabric at my home. Below are the steps and instructions on how I made this cover. I will also provide links to similar products on Amazon. Ok, so first the supplies. I used three yards of cotton print, white thread, 6 yards of 3mm white parachord I already had in my stash and some micro magnets I had bought off of Amazon, and one adjustable tension rod.
If your missing something go ahead and get it here.
Gingher sewing scissors https://amzn.to/49JenQA. Amazon (I love these they are my special ones reserved only for fabric)
Parachord https://amzn.to/3uV1Jix Amazon
Coats sewing thread https://amzn.to/3SSBpxz Amazon
Small magnets https://amzn.to/3SYOu8O Amazon
Mini glue sticks https://amzn.to/3uOpKYD Amazon
Mini glue gun https://amzn.to/48vGyBB Amazon
Sewing pins https://amzn.to/3OVOOUB. Amazon
Get your supplies together. Tension rod not shown here.

Next is to measure the sides of the rack that you want to have the panels on. I only did the sides and the front with the closure but if you decide to enclose the back as well make sure you have enough fabric to do so. To my measurements I added one inch on the sides and bottoms to do rolling seems and five inches on the top of each panel to make the fold to house the tension rod on the front panels and I used rope for the side panels.
So to do a rolling hem first fold the edge of the fabric wrong sides together about a quarter of an inch.

Then fold over on top of itself one more time. It should look like this.

I do not use any pins when doing this type of hem and I find that it has become my go to on most sewing projects. Once the first bit is folded I put it under the foot on my machine and it will allow me to continue folding the fabric as it goes through the machine. I do all of the edges even the one I will be folding over to make the sleeve for the rod later because it gives it a cleaner look. (I realized I needed a picture of this so just pretend those stitches aren’t there).

Now I make the sleeves for the rod I will use. At the top of each of the panels fold over about two inches.

I didn’t use pins and just eyeballed it as it was going through the machine so if you need to pin the fabric for stability please feel free.

You have now made the sleeve for the tension rod and it should look like this.

Cut your parachord or thick string 12 inches long you should have 18 pieces of cord. If you need to melt the ends to seal them do this now.

Now measure 3 equal distances on the wrong side of each panel and mark with a pen. This is where you will be attaching the ties that will keep your panels secure on your rack. Line them up on your machine and with the zig zag setting secure them to the fabric. It will look something like this.


Once you are finished adding all of your parachord or rope now comes the fun part. Adding the magnets.
So I had originally bought these tiny magnets from Amazon to use them to create collar pins that didn’t pierce the shirt. I had some left over so I thought having a magnetic closure might work. And it did! Genius moment . So I started by laying my two front panels side by side, lining up the edges and over lapping the middle where it would close by about an inch and half. I then folded the seam of the fabric laying on top over about a half an inch. I then took a maker and put a dot on each panel for where I would put the magnet. Like so.

I did a magnet every 7 inches all the way down the two front panels. Now the fun part. It’s time to plug in your glue gun. This is how we will adhere the magnets to the fabric. Simple but it works.
These magnets were fairly cheap and I’m so glad I had them. they are 6 mm wide and where just the right size.

Once the glue gun is hot you will apply a small amount of glue to each of your dots you marked adding the magnets as you go. Make sure that when you are checking which side of the magnet needs to face the other. You don’t want to do this and then find out you glued one the wrong way and that they are doomed to fight each other forever.


After all of the magnets have been glued on they should all line up and make beautiful snapping sounds when you hold them next to the other panel. Now let’s put them on the rack.
The poor naked rack.

Thread the tension rod through both of the front panels. And honestly I just zip tied the rod to the top of the rack. Then I tied all of tie straps around the post. For the side panels I ran more parachord through the rod seam and tied it at the top of the rack and continued tying my straps down the sides. This is what it looked like on the inside.

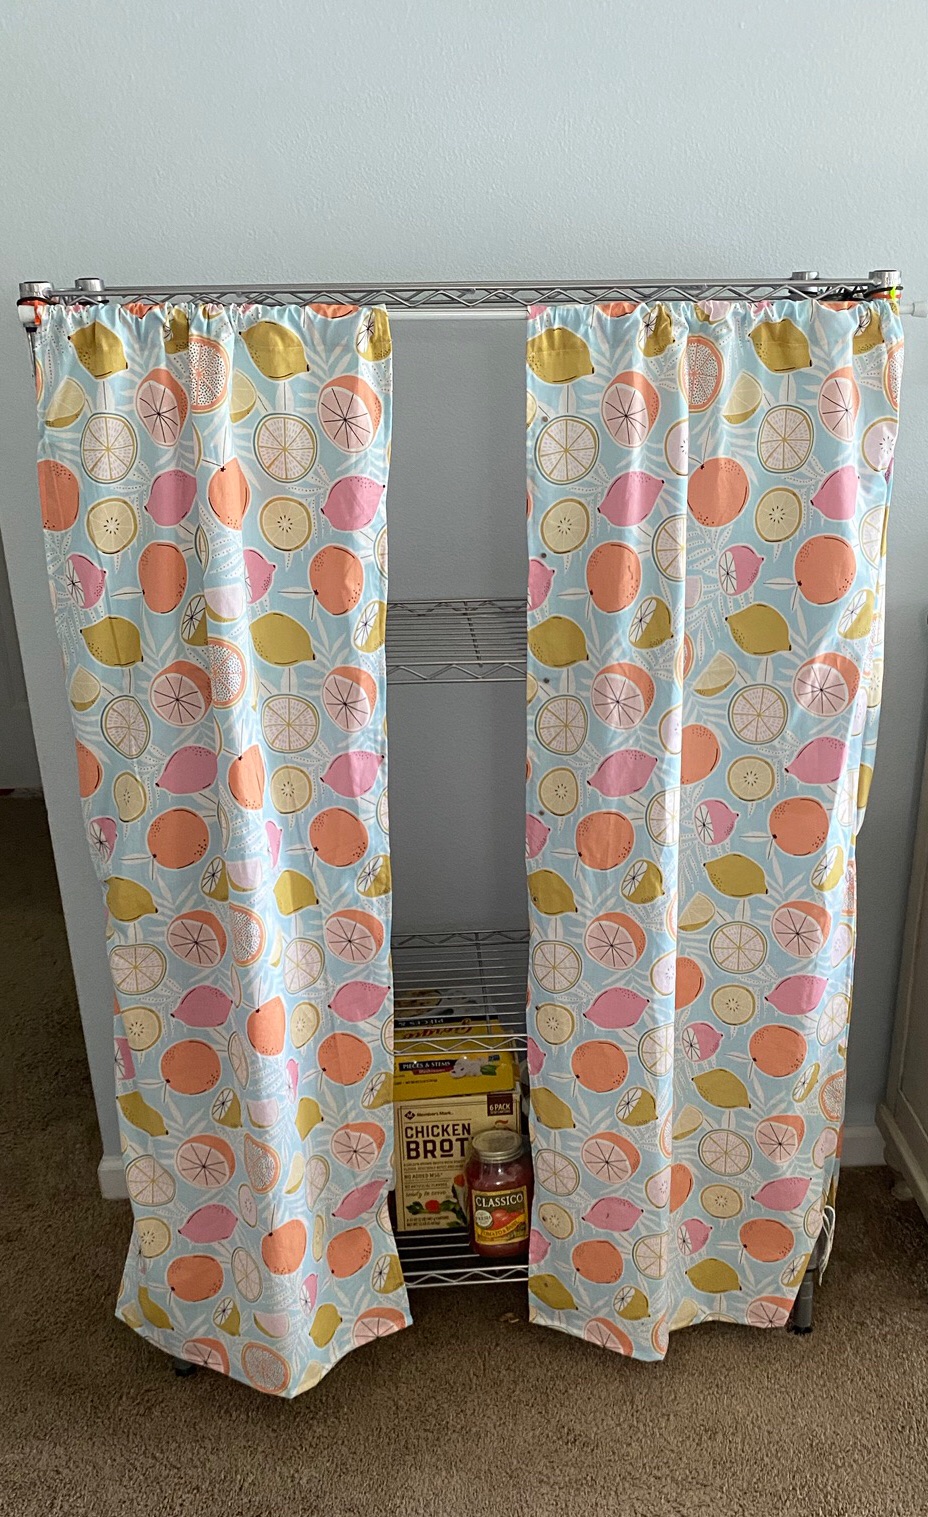
And this is what it looks like with all of the panels on the rack

And here it is closed. Which is how it probably will be for most of the time

The fabric is a little wrinkled but that’s ok the wrinkles will fall out in time. I am very happy about how well this turned out. Now it’s not an open clustery mess. I hope this inspired you to cover something in fabric today and bring some color to your life. See you next time!
Leave a Reply